Neos is a modern content management system, known for its flexibility and ease of use. Behind the project we have 19 active team members spread across 3 agile teams, and 85 contributors to the project in total, and if you ever visit a Neos event or a code sprint, you will soon find out that we are more like a family, than a corporation. In fact Neos is a rare case when large open source project is not being backed by any commercial company.
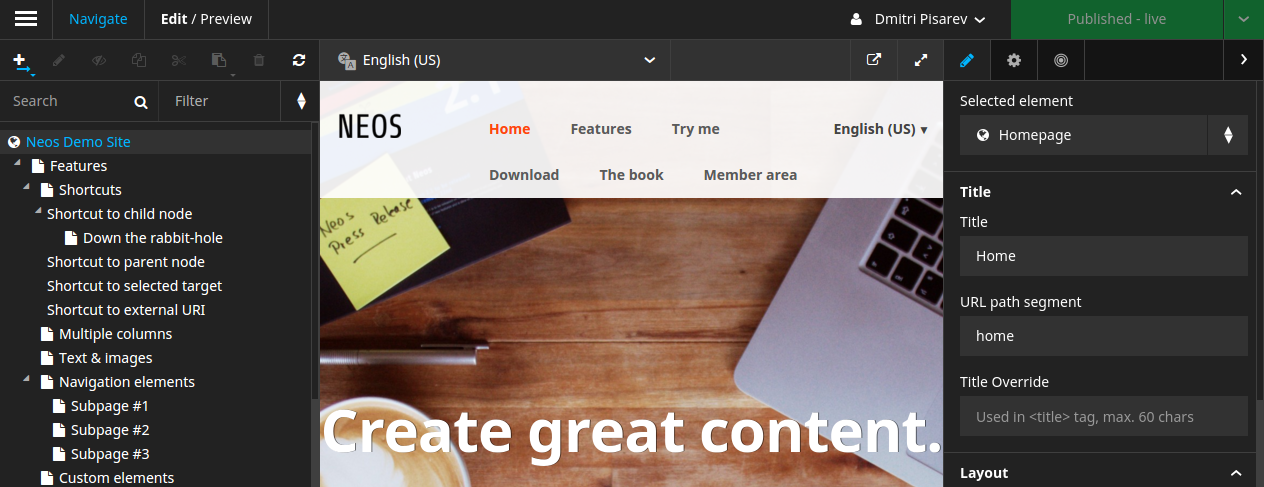 Current UI of Neos
But don’t worry, I won’t spend the rest of the article worshiping our product or describing all of its features (even though it totally deserves it).
I have some other story to tell you, namely how we approached the rewrite of Neos UI with React, Redux, and the rest of modern and shiny JS stack of 2016.
The web is full of Redux tutorials and great learning materials, but it is much harder to find real open source projects of our scale to be written with modern JS stack (oh, I have overlooked that Calypso also uses Redux, thought it had flux). In this write-up I will try to do two things at once: give you a brief walkthrough of our codebase, alongside some theory behind the parts of the stack that we have chosen. Be warned though, we are currently in the very beginning of the rewrite, so the code that you will see is pretty much WORK IN PROGRESS.
The Decision
Undertaking a complete UI rewrite was not an easy decision to make. You see, by now we have one of the most intuitive UIs in the content management world, mostly stable and complete. It was written in EmberJS 1.x and for its time was pretty neatly built. But with time things started to get out of hand, the complexity of it multiplied and development of new interface features started to cost more and more. Touching one piece of it could backfire in other least places, we had no interface tests so refactoring it was not easy too, and the whole thing just didn’t feel predictable and fun to work with any longer. The last drop was a difficulty of upgrading it to Ember 2.x, too many things had changed during the time and we wanted to rethink multiple things anyways.
To evaluate the decision, two amazing core team developers, Wilhelm Behncke and Tyll Weiß, had spent a few days under cover to built a proof-of-concept prototype, which was able to convince the rest of the team that we should go for it.
Last week we had a code sprint in Dresden where more developers joined the rewrite effort, and now we have 6 people (@WilhelmBehncke, @inkdpixels, @DerGerDner, @skurfuerst, @MarkusGoldbeck and me) actively working on it and about 5 more feeling intrigued and wanting to join our efforts too.
Lets Pretend This is a Tutorial…
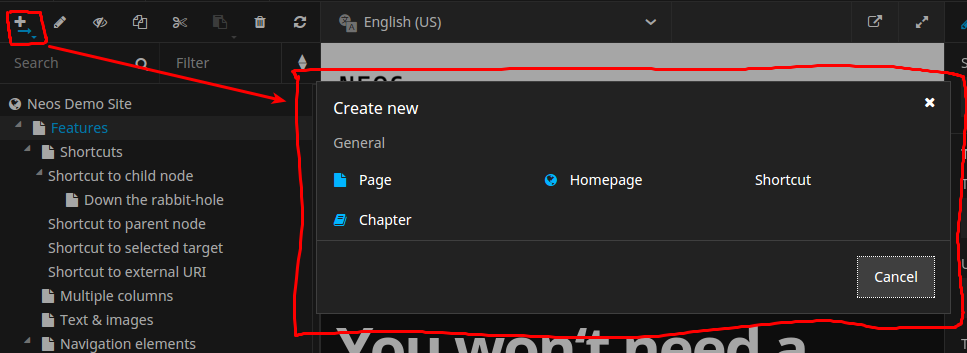
The AddNodeModal dialog that we are going to implement
I will try to make code walkthrough look more like a tutorial. As a kind of tutorial assignment, I will be using the feature on which I was working during last week. Our task would be to create a dialog for creating nodes (i.e. pages or content elements in Neos), that will provide you with a choice of all possible page types that are allowed to be created in the given place, and that would finally send the command to the server API, creating a new node of the chosen type. Let’s call it AddNodeModal.
React Components
So to render our AddNodeModal we would need a couple of components: Dialog, Button, Icon, Headline and Grid (to nicely layout buttons into multiple rows). Luckily all of the needed components were already created by somebody else, so we can just play a bit of Lego composing our piece of UI out of existing components.
AddNodeModal container component
State
For our AddNodeModal we would need two things stored in the state: reference node, relative to which the new node would be created, and an insertion mode (inside, before, after). Let’s store these two values at UI.AddNodeModal.referenceNode and UI.AddNodeModal.mode inside the state.
Our dialog will show up when we put some node into referenceNode, and disappear once we clear that value.
Reducers
So to manipulate the state we would need to create a reducer handling two actions: OPEN and CLOSE. OPEN would set referenceNode and mode to provided values, CLOSE would clear the value of referenceNode, closing the dialog. Nothing difficult so far, right?
Selectors
We had no difficulty in getting referenceNode and mode from the state, but now we have a bigger challenge coming. We need to get a list of allowed nodetypes for the reference node and mode. For that, we need to combine data from multiple places across the state: nodeType data, nodeType constraints, referenceNode, mode, parent and grandparent node to given referenceNode and so on. But that’s not all, now we need to group allowed node types and sort them in the right order. You see, quite a complex logic that is comprised of multiple simple selectors, each of which needs independent testing and performance optimization.
So we got the list of allowed node types, nicely grouped and sorted. Now it is time to add some behavior to them that would actually create nodes.
Side-effects
We have a fancy new server API to describe the desired actions we want to perform on the server. Any action we want to take is encoded as a change object, e.g. Create, Move, Property and so on. For our task of creating nodes, we need to choose between actions Create, CreateAfter and CreateBefore actions based on mode state. After we construct correct change object, we need to send it as a parameter to Changes.add action creator, and it would be transparently picked up by the changes saga and sent to the correct API endpoint on the server. On success saga fires a FINISH action, on failure FAIL.
Testing
It should go without saying that we must cover at least critical parts of our codebase with tests. In the given task we have to test reducers, selectors, component itself and probably sagas too. The most critical parts are reducers and selectors, and they are the easiest to test, after all, they are just a pure functions: pass some input and expect some output! To write assertions in a behavioural style we use chai. To run them in real browsers we use Karma. For acceptance tests we use Selenium. I have yet to finish writing acceptance tests for this feature, so I will update this article once I have some code to show.
So I hope this gives you some insights into how we apply core React & Redux architecture principles to our app. Feel free to browse the rest of the codebase, I am sure you will find a lot of interesting stuff there.
The Neos Family
If you stayed with me this far, you may be interested in the project itself, and not only the technology we use. As some very clever people put it to words, open source product is nothing without people behind it. And we are truly blessed here: we are not just some nerds scattered all around the globe, neither are we employees paid by some businesses to do coding. We are a community of friends, almost a family. We organise code sprints regularly to not only code together but as well share all the good things we are given in this life, be it a walk across the Elba river in the night or a game of laser tag.
So if you like our code, come join us! We have a lot of code to write together, but, in the end, it does not have to stop there, let’s be friends!
Please RT this stuff, if you have friends who may be interested in this as well:
@neoscms goes for full #reactjs/#redux UI rewrite, and you may take something away from it too! https://t.co/UiSEW7tH5e
— Dmitri Pisarev (@dimaip) March 14, 2016
And now for some tweet-media to prove all of this is real! =)
React.js Workshop sponsored by @sitegeist_de at the #neoscms code sprint. Go, @inkdpixels! pic.twitter.com/NSKWdu3BeD
— Wilhelm Behncke (@WilhelmBehncke) March 7, 2016
Florian took the sprint participants on a cool tour around Dresden - coding and education go very well together! ~tg pic.twitter.com/rTyvlUu715
— The Neos Project (@neoscms) March 8, 2016
The early birds are already at work! It's a pleasure having all of you here in Dresden :D #NeosCMS pic.twitter.com/HAoq26GebQ
— Sandstorm (@sandstormmedia) March 9, 2016
Day 3 on the #NeosCMS codesprint. Awesome stuff with awesome people! Let's get it on! :) #oss pic.twitter.com/r1erZYQsV8
— inkdpixels (@inkdpixels) March 9, 2016
Exciting to see so many (new) developers working on the new #neoscms UI technology stack ... it's taking shape! pic.twitter.com/9POKUXrDPT
— Robert Lemke (@robertlemke) March 9, 2016
Sunny hacking in a nice location sponsored and organized by @sandstormmedia - thank you guys! #neoscms pic.twitter.com/1U16FlSqyi
— Robert Lemke (@robertlemke) March 9, 2016
Had an awesome evening playing Lasertag with the team! This #NeosCMS sprint rocks! ~tg pic.twitter.com/0avtjTSx0z
— The Neos Project (@neoscms) March 9, 2016
The retro is in full swing, with three team members joining remotely. Pretty inspiring for me so far. #neoscms pic.twitter.com/nHjOtrWgvW
— Robert Lemke (@robertlemke) March 10, 2016
Lots of good things happened since our last retro #neoscms pic.twitter.com/GFPnVFPjZK
— Robert Lemke (@robertlemke) March 10, 2016
Very nice #neoscms retrospective here - I like it a lot! pic.twitter.com/Nh4BRrA8lr
— Sebastian Kurfürst (@skurfuerst) March 10, 2016
@sandstorm_tobi sharing our thoughts on #neoscms vision! #codesprint pic.twitter.com/BhsUMIXtoU
— Sebastian Kurfürst (@skurfuerst) March 10, 2016
Thanks everybody who was at the #neoscms sprint, have a safe trip home. #neosFamily #spirit pic.twitter.com/pWKp8OeHjV
— Sebastian Kurfürst (@skurfuerst) March 11, 2016